Created
Aug 1, 2024 10:45 AM
Favorite
Favorite
Priority
备注
推荐
类型
gitHub资源
页面效果

嵌入博客效果: 嵌入博客效果: Ygria’s Blog 锻炼页面
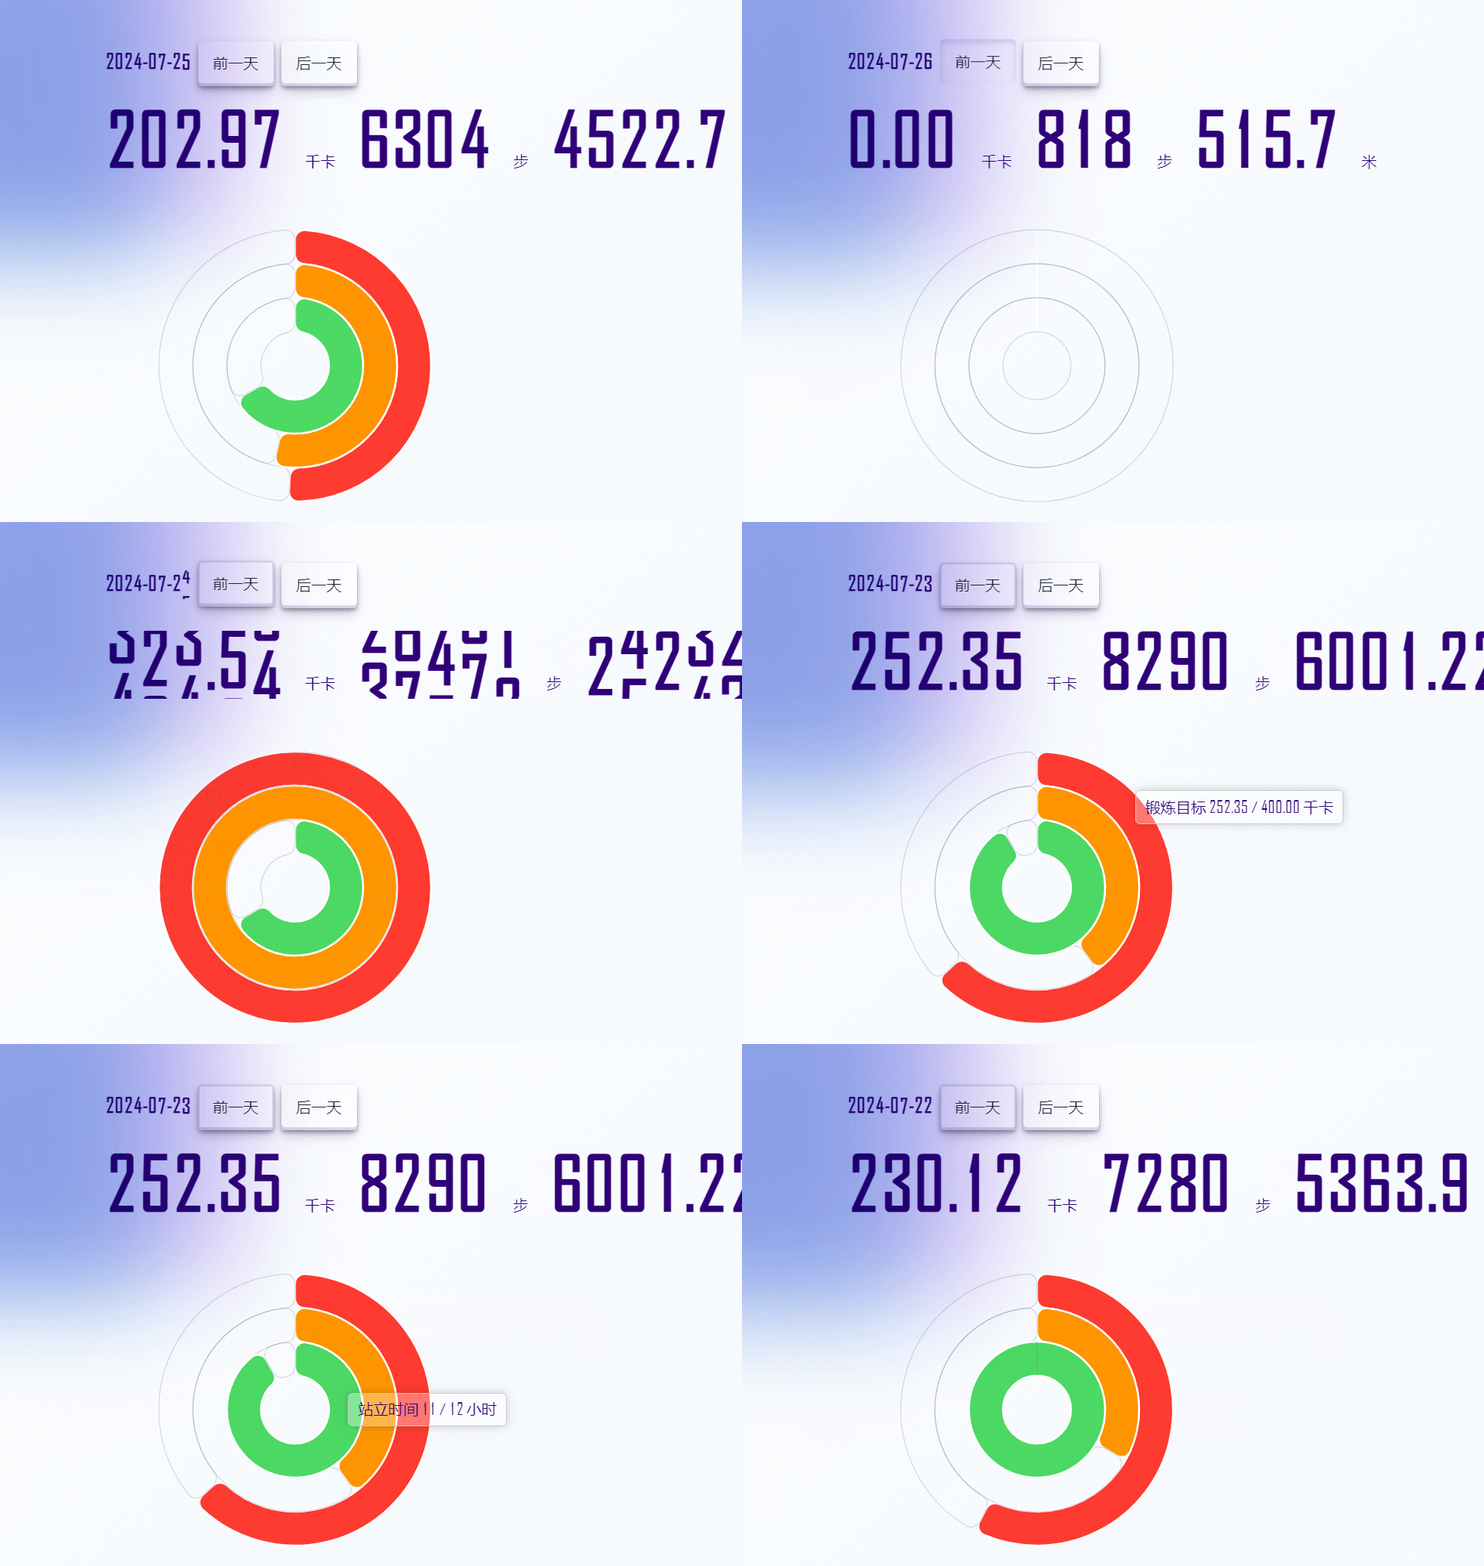
基于苹果健康数据,搭建了个人锻炼信息页面,会显示每日的锻炼圆环,并根据目标完成情况渲染热力图(100%达成显示绿色,60%及以上显示橙色,否则为红色。)
表格中是每次锻炼的记录,会记录锻炼的类型、耗时、消耗热量等信息。
下面将介绍页面的搭建过程。
搭建过程
工作流
通过搭建如下工作流,实现在手机上点击一下,就能同步构建一个页面。
数据来源: Hadge
Hadge GitHub - ashtom/hadge: 💪 Export workout data from Health.app on iOS to a GitHub repo 是一款可以安装在苹果手机上,实现健康数据导出到Github仓库的APP。你可以从TestFlight安装它。
安装、授权Github和健康数据读取,它就会自动为你创建一个名字叫health的Github私人仓库,里面是csv格式的健康数据,包括每日活动量、步数、锻炼等等。
页面
新建Github仓库下React项目(我是基于开源项目 Running Page开发,想法是后续如果有GPX数据可以集成地图,所以是直接Fork的Running Page。)
CSV文件读取
将health中的文件拷贝到public目录下,就可以在项目中使用这些数据了。
使用
papaparse读取csv文件,定义一个读取文件的hook:typescript
import { useState, useEffect } from 'react'; import { readString } from 'react-papaparse'; const useCSVParserFromURL = (fileURL) => { const [data, setData] = useState([]); const [loading, setLoading] = useState(false); const [error, setError] = useState(null); useEffect(() => { if (!fileURL) { setLoading(false); return; } const fetchCSV = async () => { setLoading(true); try { const response = await fetch(fileURL); if (!response.ok) { throw new Error('Network response was not ok'); } const csvString = await response.text(); readString(csvString, { header: true, // optional: if your CSV string has a header row skipEmptyLines: true, // 忽略空行 complete: (result) => { setData(result.data.reverse()); setLoading(false); }, error: (err) => { setError(err); setLoading(false); }, }); } catch (err) { setError(err); setLoading(false); } }; fetchCSV(); }, [fileURL]); return { data, loading, error }; }; export default useCSVParserFromURL;
hook使用:
typescript
const { data } = useCSVParserFromURL('/distances/2024.csv'); const { data: activityData } = useCSVParserFromURL('/activity/2024.csv');
将读到的内容根据日期归并成一个数组,在点击“前一天”“后一天”时切换读取数组的下标即可。
图表绘制
使用 d3和 react-calender-heatmap绘制图表。
d3可以灵活地绘制svg图形,我用它来绘制三层圆环。
react-calender-heatmap提供了react组件,直接把数据传进去就行了。 我定义了锻炼目标完成显示为绿色,完成60%及以上显示为橙色,否则为红色。
typescript
import { useEffect, useRef, useState } from 'react'; import useCSVParserFromURL from '@/hooks/useWorkouts'; import { TileChart } from "@riishabh/react-calender-heatmap"; const Heatmap = () => { const { data: activityData } = useCSVParserFromURL('/activity/2024.csv'); const [dummydata,setDummyData] = useState([]); useEffect(() => { if (activityData.length === 0) return; // 解析数据 const parsedData = activityData.map(row => { const date = row["Date"]; const calories = +row["Move Actual"]; const caloriesGoal = +row["Move Goal"] const status = calories > caloriesGoal ? 'success' : calories > caloriesGoal * 0.6 ? 'warning' : 'alert' return { date: new Date(date), status: status }; }); setDummyData(parsedData) }, [activityData]); return ( <> <TileChart data={dummydata} range={6} /> </> ); }; export default Heatmap;
看我的热力图就知道我有多懒了……我的目标是每天400千卡,没有很高。得努力动起来把格子都填充成绿色了~
表格的渲染沿用了running page项目中的run table,遍历activity中的内容并渲染。
样式
背景和文字样式使用了 animata.design : # Blurry blob和 animata.design : # Ticker。
这个网站提供了很多使用TailwindCSS实现的动效组件,并支持直接复制粘贴到项目中,无需再安装依赖,侵入性低,使用简便。使用时也可以学习学习,非常不错~
悬停和选中表格某列的文字效果来自于 https://primereact.org/ 首页,通过
webkit-background-clip: text; 文字蒙版 + 渐变背景 + 动画,让文字有了彩色渐变的效果。部署
使用CloudFlare Pages 托管部署,监听到push事件时触发构建。
Workout Page 中拉取health内容
上一步开发中,我们是将health仓库下csv文件拷贝到了workout pages的public目录下。那么怎么实现自动同步呢? 我们可以使用Github的Action,在构建时checkout health中的内容,并commit到workouts page中。 首先需要在Github中新建一个具有health仓库访问权限的token 前往 Github Setting, 新建token
将这个token配置到Action的Secret中:
配置Action,先克隆当前库(workouts page),再签出health (指定path为
/public),再提交。yaml
name: Health Data Sync on: push: branches: - master workflow_dispatch: jobs: sync-repo: runs-on: ubuntu-latest steps: - name: Checkout uses: actions/checkout@v3 - name: Checkout other repository uses: actions/checkout@v3 with: repository: Ygria/health path: public token: ${{ secrets.HEALTH_TOKEN}} # 使用自定义的 token - name: Commit changes uses: EndBug/add-and-commit@v8 with: author_name: Apple Health Sync # 提交者的GitHub用户名 author_email: Apple Health Sync # 提交者的电子邮件 message: 'Automatically commit changes' # 提交信息 add: '.' # 添加当前目录下的所有变更
这样我们就实现了每次构建时,用的都是最新的健康数据了。
health更新触发workout pages
问题来了,health内容变化了,该如何判断什么时候构建workout pages呢?
目前触发health更新是在手机上去hadge app点击,如果使用手机快捷指令触发Github Action,有可能有时序问题。(定时任务可能也是个好主意。)
我选择了在health中配置一个webhook,通过api触发workouts page中Health Data Sync的执行。Github支持通过REST接口操作Github Action,可参考: Github Docs: REST Actions
在配置webhook时,我发现不支持自定义请求头和请求体,所以又去Cloudflare配置了一个worker做代理。安全起见,Github请求端使用secret加密,worker侧做了密钥验证。
Cloudflare worker代理
Worker 使用
Worker的使用可以参考官方教程 Learn Cloudflare Workers - Full Course for Beginners,是个很长的视频,看前十分钟就差不多够用了。
以更易于本地调试的方式使用Cloudflare Worker:
- 在控制台使用
npx wrangler,(mac os需要加上sudo),第一次使用会自动安装wrangler最新版本
- 使用
wranger init创建一个新项目
- 在在线编辑页面上,也可以点击
Develop with Wrangler CLI页签,将配置过的Worker 克隆到本地进行调试。
参数准备和脚本
- 先通过REST请求,拿到需要触发的workflow id
- 在Github中新建一个具有workflow权限的token,调用Github api时要加到header中
脚本内容
javascript
addEventListener('fetch', event => { event.respondWith(handleRequest(event.request)) }) async function computeHMAC(secret, message) { const encoder = new TextEncoder() const key = await crypto.subtle.importKey( 'raw', encoder.encode(secret), { name: 'HMAC', hash: 'SHA-256' }, false, ['sign'] ) const signature = await crypto.subtle.sign( 'HMAC', key, encoder.encode(message) ) return hex(signature) } function hex(buffer) { const byteArray = new Uint8Array(buffer) const hexCodes = [...byteArray].map(value => { return value.toString(16).padStart(2, '0') }) return hexCodes.join('') } function secureCompare(a, b) { if (a.length !== b.length) { return false } let result = 0 for (let i = 0; i < a.length; i++) { result |= a.charCodeAt(i) ^ b.charCodeAt(i) } return result === 0 } async function handleRequest(request) { const url = new URL(request.url) const signature = request.headers.get('x-hub-signature-256') if (!signature) { return new Response('Missing signature', { status: 400 }) } // 预期的 token const expectedToken = 'your token' const body = await request.text() const expectedSignature = `sha256=${await computeHMAC(expectedToken, body)}` if (!secureCompare(signature, expectedSignature)) { return new Response('Unauthorized', { status: 401 }) } const targetUrl = 'https://api.github.com/repos/name/repo/actions/workflows/your flow id/dispatches' // 创建新的请求头 const newHeaders = new Headers({}) newHeaders.set('Content-Type', 'application/json') newHeaders.set('Authorization', 'your token') newHeaders.set('Accept', 'application/vnd.github.v3+json') newHeaders.set('User-Agent', 'application/vnd.github.v3+json') // 创建新的请求体 const newBody = JSON.stringify({ "ref":"master" }) // 转发请求到目标服务器 const response = await fetch(targetUrl, { method: 'POST', headers: newHeaders, body: newBody }) // 返回目标服务器的响应 const responseBody = await response.text() return new Response(responseBody, { status: response.status, headers: response.headers }) }
部署worker后,将worker的访问url配置到health的webhook中即可。
嵌入博客
嵌入时样式
想在我的Hugo静态博客中也能看到这个页面,可以使用iframe嵌入。嵌入的页面样式略有不同,可以在workout pages中,增加一个hook来判断当前是否是嵌入的页面:
typescript
import { useEffect, useState } from 'react'; const useIsEmbedded = () => { const [isEmbedded, setIsEmbedded] = useState(false); useEffect(() => { // 检测当前页面是否被嵌入到 iframe 中 if (window.self !== window.top) { setIsEmbedded(true); } }, []); return isEmbedded; }; export default useIsEmbedded;
使用:控制嵌入时不显示header
tsx
import useIsEmbedded from '@/hooks/useIsEmbedded'; const isEmbedded = useIsEmbedded(); {!isEmbedded && (<> <Header /></>)}
通过一些样式调整,可以让页面嵌入显得更融合。
hugo中iframe
go
{{ define "body_classes" }}page-workouts{{ end }} {{ define "main" } {{ $src := .Params.src }} {{ $width := .Params.width | default "100%" }} {{ $tryautoheight := .Params.tryautoheight | default true }} {{ $style := .Params.style | default "min-height:98vh; border:none;" }} {{ $sandbox := .Params.sandbox | default false }} {{ $name := .Params.name | default "iframe-name" }} {{ $id := .Params.id | default "iframe-id" }} {{ $class := .Params.class }} {{ $sub := .Params.sub | default "Your browser can not display embedded frames. You can access the embedded page via the following link:" }} {{ with $src }} {{ if $tryautoheight }} <script type="text/javascript"> function resizeIframe(iframe) { iframe.height = iframe.contentWindow.document.body.scrollHeight + "px"; } </script> {{ end }} <div className="container"> <div className="blob-container"> <div class ="blob blob-blue" ></div> <div class = "blob blob-purple" ></div> </div> </div> <iframe id="{{ $id }}"{{ with $class }} class="{{ $class }}"{{ end }} src="{{ $src }}" width="{{ $width }}" name="{{ $name }}"{{ with $style }} style="{{ $style | safeCSS }}"{{ end }}{{ if $tryautoheight }} onload="resizeIframe(this)"{{ end }} referrerpolicy="no-referrer"{{ if (eq $sandbox false)}}{{ else if (eq $sandbox true) }} sandbox{{ else }} sandbox="{{ $sandbox }}"{{ end }}> <p>{{ $sub }} <a href="{{ $src }}">{{ $src }}</a></p> </iframe> {{ end }} {{end}}
在锻炼 markdown文件的front matter中,声明需要嵌入的页面url即可。
小结
锻炼页面完工~希望可以通过这个页面,督促自己好好运动起来,不当懒惰虫。
更新于 2 天前
#建站
#编程
07月21日
评论一下 ...

![2024_年终总结: [代码与咖啡]打工人的漂流记](https://www.notion.so/image/https%3A%2F%2Fprod-files-secure.s3.us-west-2.amazonaws.com%2F68202bb5-9faf-4bfe-9cc4-aaf29bc1fbcc%2Fb7607bba-e20c-4a48-83e7-cdbac70ebdbf%2Fcodecoffee.jpg?table=block&id=e0566808-4d66-401f-b9c8-6d4fd5f8a9a4&t=e0566808-4d66-401f-b9c8-6d4fd5f8a9a4&width=800&cache=v2)

